Introduction
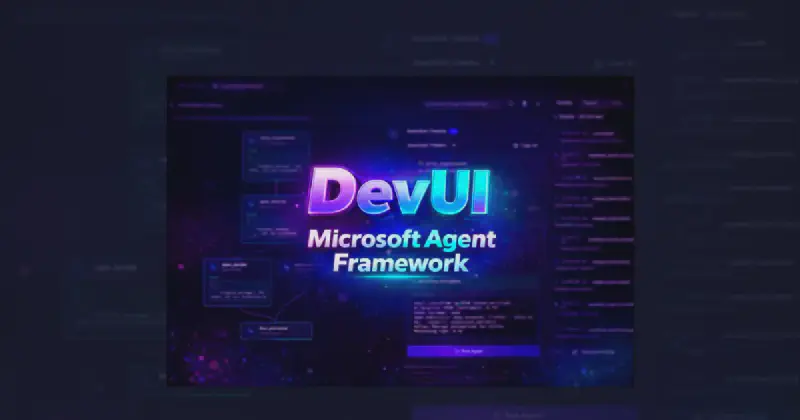
Building and testing AI agents shouldn’t require building a complex user interface from scratch. That’s where DevUI comes in - a powerful development tool that’s part of the Microsoft Agent Framework for .NET 10. In this comprehensive guide, you’ll learn how to set up, configure, and test multiple AI agents with different personas using a simple web interface.
Whether you’re building chatbots, AI assistants, or conversational applications, DevUI provides an intuitive playground similar to Swagger UI but designed specifically for AI agents.
Watch the video tutorial above for a complete walkthrough, or continue reading for the step-by-step guide.
What is DevUI?
DevUI is a development interface included with the Microsoft Agent Framework that enables developers to:
- Test AI agents in real-time during development
- Manage conversations with multiple agents simultaneously
- Debug agent responses without building a production UI
- Prototype quickly before implementing custom interfaces
- Validate system prompts and agent behavior instantly
Think of DevUI as your AI agent playground - a tool that accelerates development by providing immediate visual feedback on your agents’ behavior and responses.
Key Benefits
- Zero UI Code Required: Test agents immediately without building React, Angular, or Blazor interfaces
- Multi-Agent Support: Switch between different agents in the same session
- Conversation History: Built-in conversation management and history tracking
- Development-Only: Easily disable for production deployments
- OpenAI Compatible: Works with any OpenAI-compatible endpoint including Azure OpenAI, GitHub Models, and more
Prerequisites
Before we begin, ensure you have:
- .NET 10 SDK installed (Download here)
- Visual Studio 2026 or VS Code with C# extensions
- Basic knowledge of ASP.NET Core
- API access to an OpenAI-compatible service (OpenAI, Azure OpenAI, GitHub Models, etc.)
- API Key for your chosen AI service (you can use GitHub Copilot)
Required NuGet Packages
For this tutorial, you’ll need the following packages:
|
|
Package Overview
| Package | Purpose |
|---|---|
Microsoft.Agents.AI.DevUI |
Provides the DevUI web interface |
Microsoft.Agents.AI.Hosting |
Agent hosting infrastructure and registration |
Microsoft.Extensions.AI |
Core AI abstractions and interfaces |
OpenAI |
OpenAI SDK for connecting to AI models |
Project Setup
Let’s create a new ASP.NET Core application:
|
|
Add the required packages as shown above, and we’re ready to start coding!
Implementation Guide
Step 1: Configure the ChatClient
Open Program.cs and set up your application builder and chat client:
|
|
?? Security Best Practice: Always use environment variables or secure configuration for API keys. Never hardcode credentials in your source code!
Step 2: Register Required Services
Add the necessary services to your dependency injection container:
|
|
These services provide:
- AddChatClient: Registers the chat client for dependency injection
- AddOpenAIResponses: Handles OpenAI API response processing
- AddOpenAIConversations: Manages conversation state and history
Step 3: Create AI Agents
Now comes the fun part - creating your AI agents! The framework makes this incredibly simple:
|
|
** Pro Tip**: Your system prompt is crucial! Be specific about the agent’s personality, knowledge domain, and response style for best results.
Step 4: Configure Endpoints and Run
Finally, build the app and register the DevUI endpoints:
|
|
Complete Code Example
Here’s the complete Program.cs:
|
|
Running Your Application
Start the Application
Run your application using:
|
|
Or press F5 in Visual Studio.
Access DevUI
Once the application starts, navigate to:
|
|
Replace [PORT] with the port number shown in your console output (typically 5000 or 5173).
Testing Your Agents
- Select an Agent: On the left sidebar, you’ll see both agents listed
- Start a Conversation: Click on an agent to begin chatting
- Send Messages: Type your message in the input box
- View Responses: Watch your agent respond in character
- Switch Agents: Click another agent to test different personas
- View History: All conversation history is maintained automatically
Development Best Practices
1. Use Environment-Specific Configuration
Only enable DevUI in development environments:
|
|
2. Secure Your API Keys
Use user secrets for development:
|
|
Then access in code:
|
|
3. Configure CORS for Development
If accessing DevUI from different origins:
|
|
4. Add Logging for Debugging
Enable detailed logging to troubleshoot issues:
|
|
Troubleshooting Common Issues
Issue 1: Can’t Access /devui
Symptoms: 404 error when navigating to /devui
Solutions:
- Verify
app.MapDevUI()is called - Check you’re running in Development environment
- Ensure all three Map methods are registered:
app.MapOpenAIResponses()app.MapOpenAIConversations()app.MapDevUI()
Issue 2: Agents Not Responding
Symptoms: Agents don’t generate responses
Solutions:
- Validate your API key is correct and active
- Check your endpoint URL is accessible
- Verify
builder.Services.AddChatClient(chatClient)was called - Review console logs for API errors
Issue 3: Connection Errors
Symptoms: Network or timeout errors
Solutions:
- Check your internet connection
- Verify firewall settings allow outbound HTTPS
- Confirm your API service is operational
- Test with a simple curl request to the endpoint
Issue 4: CORS Errors
Symptoms: CORS policy errors in browser console
Solutions:
- Add CORS configuration (see best practices above)
- Ensure
app.UseCors()is called before endpoint mapping - Check your endpoint configuration in OpenAI options
Advanced Scenarios
Creating Custom Agent Classes
For complex logic, create custom agent implementations:
|
|
Integrating with Azure OpenAI
Switch to Azure OpenAI Service:
|
|
Adding Function Calling
Enable agents to call functions:
|
|
Multiple Chat Clients
Use different models for different agents:
|
|
Performance Optimization
1. Enable Response Streaming
For better user experience:
|
|
2. Implement Caching
Cache common responses:
|
|
3. Set Timeouts
Prevent long-running requests:
|
|
Deployment Considerations
Disable DevUI in Production
Critical: Never expose DevUI in production:
|
|
Environment Variables in Production
Use Azure App Configuration or Key Vault:
|
|
Health Checks
Add health checks for monitoring:
|
|
Real-World Use Cases
1. Customer Support Chatbots
Create specialized agents for different support tiers:
|
|
2. Educational Tutors
Build subject-specific tutoring agents:
|
|
3. Content Creation Assistants
Develop specialized writing agents:
|
|
Resources and Next Steps
Official Documentation
Further Learning
- Advanced Agent Patterns: Explore multi-agent conversations and orchestration
- Function Calling: Enable agents to interact with external systems
- Custom UI Development: Build production interfaces using React or Blazor
- Azure Deployment: Deploy agents to Azure App Service or Container Apps
Sample Code Repository
Find the complete source code for this tutorial on GitHub: [GitHub Repository Link]
Conclusion
DevUI provides a powerful, efficient way to develop and test AI agents in .NET 10 without the overhead of building custom interfaces. By following this guide, you’ve learned:
- How to set up the Microsoft Agent Framework
- Configure OpenAI-compatible chat clients
- Create multiple AI agents with distinct personas
- Use DevUI for rapid testing and iteration
- Implement best practices for security and deployment
- Troubleshoot common issues
The Microsoft Agent Framework, combined with DevUI, dramatically reduces the time from concept to functional AI agents. Whether you’re building chatbots, virtual assistants, or complex multi-agent systems, these tools provide the foundation for rapid, efficient development.
What’s Next
Ready to take your AI agent development further Check out these resources:
- Video Tutorial: Watch the complete walkthrough (embedded above)
- Source Code: Download the full sample project
- Community: Join discussions on GitHub and Stack Overflow
- Newsletter: Subscribe for more .NET AI tutorials
Comments and Discussion
Have questions or feedback? Drop a comment below! I’d love to hear about:
- What AI agents are you building?
- What challenges have you encountered?
- What topics would you like covered next?
Share This Article
Found this helpful? Share it with your network!